
How to Make Iron-on Embroidered Patches
Over time, people start creating new exclusive designs by picking old fashion hints. Same scenarios you can find in the patch fashion, which is becoming popular with every passing time. Nowadays, many people are running successful businesses making patches in different ways.
There are numerous techniques that you can use to make the patches easily. You can create patches by embroidery machine, by hand, and by utilizing iron. Here the point of discussion is how to make iron on embroidered patches.
Making patches by yourself is not a challenging task. You can do this easily after knowing specific procedures and regulations. In this regard, users need to arrange particular materials for making the patches.
In this topic, we thoroughly discuss the creation of iron on embroidered patches. So to know more about it, keep reading this topic till the end.
How to Create Iron-On Patches
Nowadays, it has become a trend of attaching patches on the fabric, cushion covers, shirts, and other clothes to give a unique touch of dressing. Therefore the patch creation business is at the top level. There are numerous ways to create and make iron on embroidered patches.
Most beginners get confused about creating patches and the exact development of patches. Here in this, we discuss how someone can exactly make iron-on patches.
When we talk about iron-on patches, we know three common ways of creating patches that are easier to perform and give you excellent marketing. But before we go into the deep discussion of making patches in different ways, we first explain some essential points here.
The Procedure of Making Iron-on Embroidered Patches
You can create patches by yourself easily. For this purpose, you need to arrange the suitable fabric and then create a design on it. After this, you need to select the way of making patches from three main techniques:
- Sewing zigzag stitches
- Hand embroidering
- Inkjet transfer sheet
So these are three simple ways to choose to make iron-on embroidered patches. After creating patches in these ways, you shall need to iron on these patches for getting higher results. Let’s move to the explanation of each technique separately.
There are some points related to materials that you need to complete the patch creations. Let’s move to the items you need while making iron-on embroidered patches.
- Selection of embroidery design
- Blank patch
- Tear away backing
- Pencil
- Embroidery hoop
- Embroidery floss
- Spray adhesive
- Embroidery needles
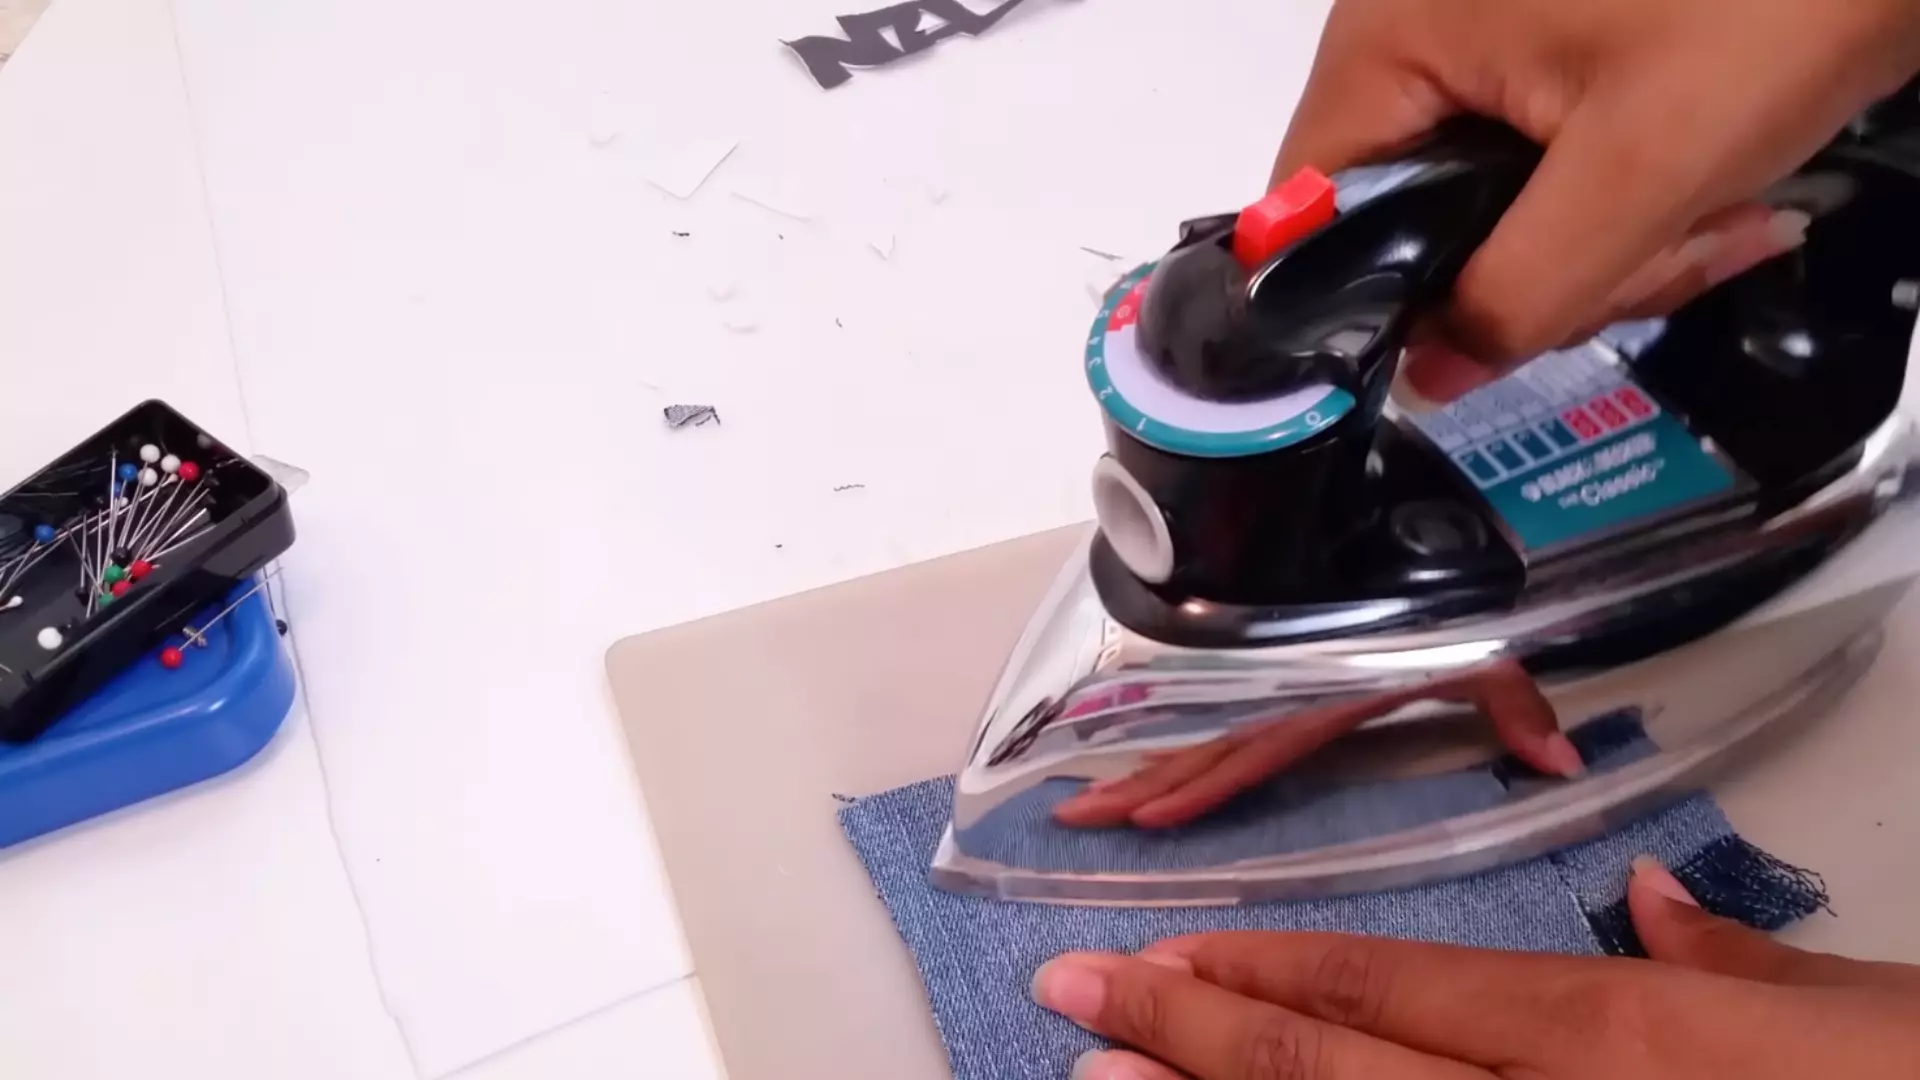
- Ironing board
- Iron
- Iron-on adhesive
So these are specific materials that are needed for completing your embroidered patches on iron.
Making Hand-Embroidered Patches
The creation of a patch by hand is based on simple steps. There are some steps given by following them, and you can create hand-embroidered patches easily.
- The first step is related to creating the design for the embroidered patches. You need to select simple techniques for drawing. In this regard, you can help from the internet by finding online embroidery simple designs.
- After creating simple designs, you need to transfer this onto your selected fabric by utilizing the pencil. In terms of getting a perfect drawing, you can trace the designs on the fabric.
- There are steps where you set the fabric for stitching. In this step, you must select the material inside an embroidery hoop in tight form. Here is the point of always keeping your fabric tight if placed in the embroidery hoop to complete hand stitching perfectly.
- You need to put the embroidery floss and thread your needle with it. And then, start stitching by following the basic stitches you want in your designs.
- After stitching, you need to cut the fabric by focusing on the dimension of designs in mind.
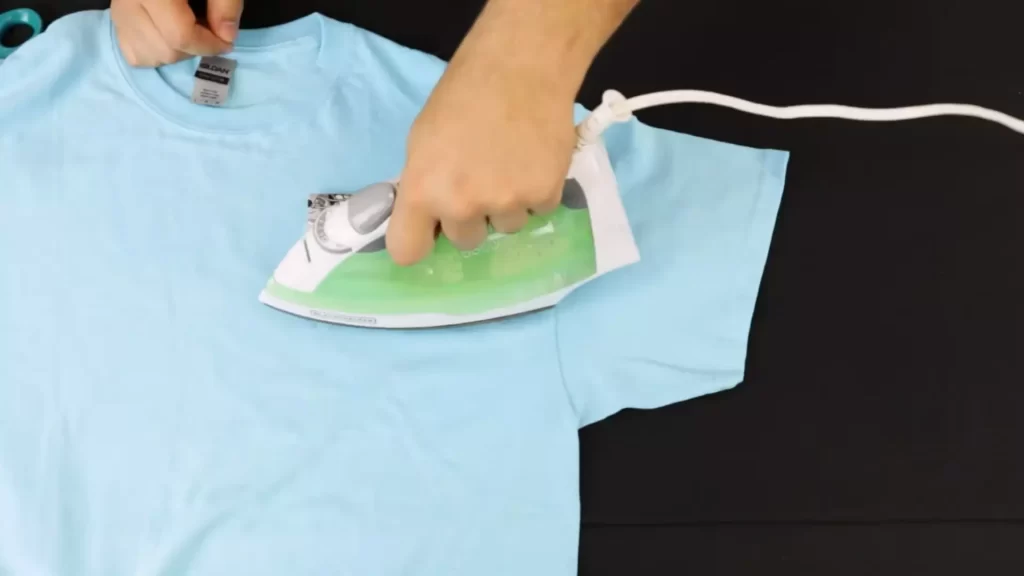
- Get the peel n’ stick sheet from the market and set your fabric on the sticky side of the sheet. After this, cut your fabric designs carefully with a perfect embroidered patch.
- You can quickly iron your design onto your different items like a backpack, jacket, and numerous others. So these are steps where you learn how to embroider a patch by hand and then learn about iron-on embroidered patches.
How to Make Embroidered Patches with a Sewing Machine
Embroidery is an art that consists of several branches in terms of creation. This means you can do this art by following various techniques. The attachments of exclusive style patches on clothes and other items have become the fashion of this modern world.
Therefore within time, people are attracted toward the creation of this business. There are various ways to create high and straightforward standard patches according to your budget.
Above we discuss the creation of patches by hand; you can also make patches by utilizing the sewing machine. Let’s move to the more straightforward steps that enable you to create patches quickly with the sewing machine.
- The first step is connected with the selection of design that you want for your patch. Beginners need to select simple artwork for drawing on their chosen fabric. Because the creation of simple techniques creates comfort in sewing and you can easily access the whole task of making patches with a sewing machine.
- Select the designs you need to draw onto your fabric either by pencil or by utilizing the tracing mechanism. After confirming the apparent appearance of your designed image, you shall need to static it.
- In this step, you need to set up your sewing machine to stitch the fabric you design for the creation patch. So firstly, select the zigzag pattern on your sewing machine, and for the setting of the zigzag pattern, the perfect number ratio is between 1-08.
- After completing the setting of the zigzag pattern, you need to adjust the stitch length, stitch width, and other essential things that you want during the smooth stitching of fabric.
- In making patches, you need to get a stitch that looks bold, thick, and attractive after stitching. Therefore, we recommend specific stitch length and width settings that provide you with proper stitching in patch creation.
- So you need to set your stitch length at 0 and stitch width at two because it provides you support in sewing quickly.
- You can increase the length of your stitch to get the longer and flatter stitch. And in case of getting a closer stitch, you need to set the height at a smaller number.
- A similar case is with the width of your fabric stitch. If you want bigger zigzag stitches, you need to select a higher number, and in smaller sizes, you need to choose the tighter zigzag style.
- This step guides you on where to start stitching and what direction to choose for getting the perfect stitching regarding making embroidered patches.
- So always start stitching from the corner of your lines. This starting gives you ease in moving from complex to more accessible stitching style. In addition, you should need to lower the presser foot to your fabric by utilizing the adjustment lever.
- You don’t have to start from the complex edges, but this recommendation creates ease of stitching.
- You can start sewing fabric design by keeping the natural hold on your foot pedal and controlling the fabric with your hands. And continue stitching by keeping all things in consideration.
- After completing the designs stitching that you draw on the fabric, now you need to move the cutting mechanism.
- So start cutting your patch according to your desired size and cut the extra fabric around the patches.
- In this step, you move to the final procedure of making patches. You need to buy the peel ‘stick fabric fuse and then stick it equally with your fabric. Place your patch towards the back or sticky side of the peels stick sheet. Then press the material on this sheet smoothly by using your fingers.
- And trim the other peel ‘stick sheet from your patch. When you cut out the patches on different sides, your patch is ready to iron it onto your baseball hat, jacket, and other items selected for attaching patches.
You can follow these steps to create patches with a sewing machine and then set these patches by ironing them onto your selected objects.
We are Wrapping up!
The use of embroidery patches on various items has become a trend in the fashion industry. Introducing the latest techniques makes this work more accessible and more advanced. We thoroughly discuss how to make iron on embroidered patches in this topic. There are three main ways to make iron-on patches by yourself. Here we debated the creation of patches by hand and making of patches with a sewing machine in detail. We discuss each factor in simple wording. We hope you like the topic.