How to Embroider with a Sewing Machine?
Embroidery is one of the fascinating things when it comes to clothes. Fancy embroidery highly charms the heart of people; therefore, they love to wear embroidered dresses. Another reason for wearing embroidery clothes might be to create a logo on the stuffed shirts. Undoubtedly, the embroidery machine performs this task efficiently and gives professional results. At the same time, you can do various types of embroidery with your regular sewing machine. We have prepared a comprehensive guide about how to embroider with a sewing machine.
For understanding the tutorial, you need to read and understand the entire post. Soon, you will know how to embroider a regular straight stitch and free-motion stitching with your sewing machine. Follow the details of the guide given below.
How to do Embroidery with Simple Sewing Machine
There are three ways of embroidery. The first is traditional, where you use hands, the other is an embroidery machine, and lastly, a sewing machine. The first method needs a lot of patience and hard work where your eyes get badly tired. However, the second option is expensive for most people who don’t work at a commercial level. So, we have left our third choice, embroidery, with a regular machine. The last option is way better for working individually from home.
You can use a computerized machine that embeds plenty of embroidery settings. You can embroider letters, flowers, and other designs with this sewing machine. Anyhow, if you don’t have a computerized sewing machine, you can still do sewing machine settings for embroidery.
Step no. 1: Prepare the Fabric
In the first step, you prepare a fabric on which you will embroider. Suppose I am going to embroider my face mask. I’ll start by designing the fabric on the right side of the cloth.
Step no. 2: Prepare the Hoop for Embroidery
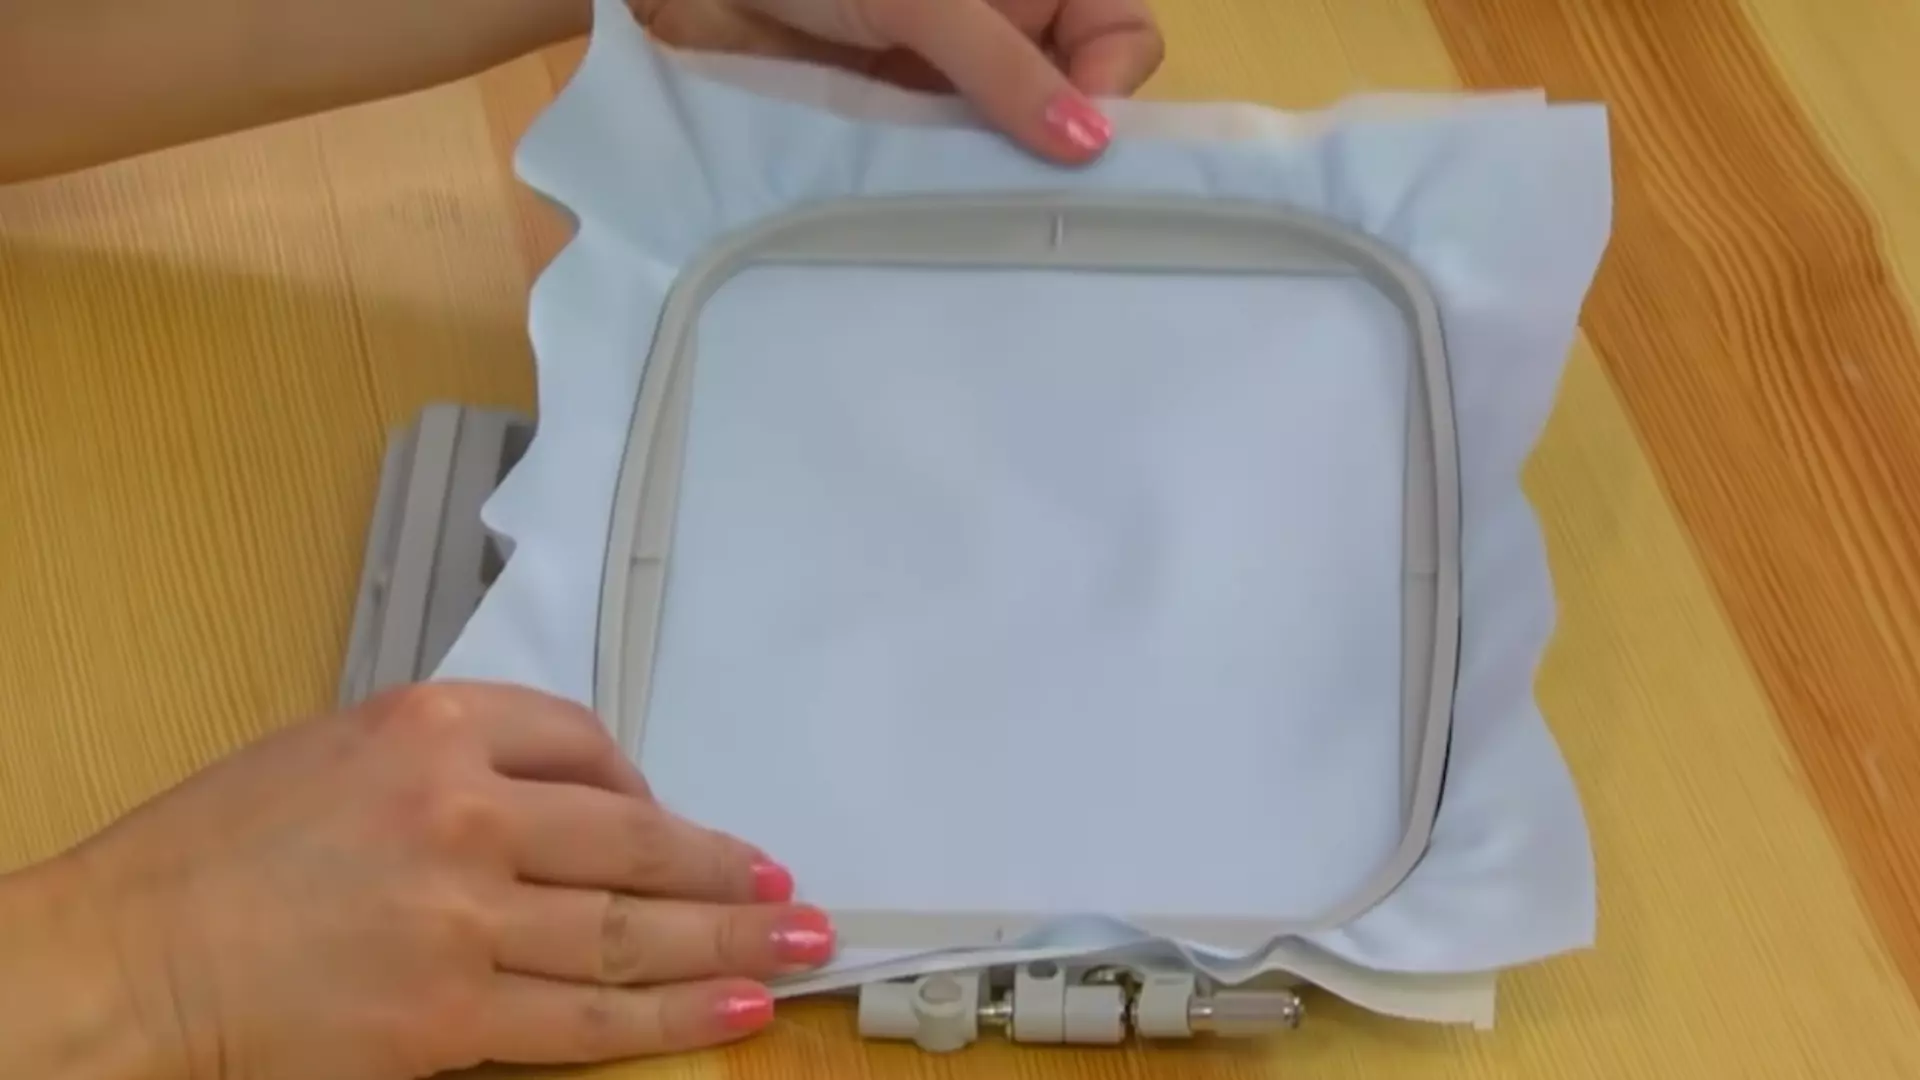
In this step, you will enter the fabric into the embroidery hoop. For this, you have to learn how to step up the hoop (Also, have a look at how to use an embroidery hoop). Go with the inner hoop, up the left side of the fabric and outer the hoop. Remember, the right fabric part should go inside the hoop whenever you embroider on a sewing machine. Make sure the hoop is placed aside when you are adjusting the machine. Now, it ensures that the design should be in the middle of the hoop. Also, there should be plenty of space for embroidering design inside the hoop.
If the design is wide and larger, you can make it into different small sections. Once one part of the design is complete, change the position and set the hoop again. Follow the same technique and guide until you complete the embroidery of the whole design.
Step no. 3: Set up the Sewing Machine
Change the old foot presser and integrate a free motion foot. Suppose you change the old needle, so it is good as well. Always try to consider the instructions given in the manual to set your sewing machine and foot. If there is a bar on foot on the right side and you remove it, again set the position of thread and needle.
A switch or button on the machine will permit you to press down the feed dogs. Some of the machines have a button on the back of the foot. Even some sewing machines don’t have any switches and buttons. Don’t worry; you can integrate a darning plate that will be in between the fabric and feed dogs. Hence, the feed dogs don’t touch the fabrics. It is best practice before you insert the needle and put the thread in it, and add a free motion foot.
Now, inspect the width and length of the fabric and stabilize it. Initially, use the straight stitch on the machine. Keep adjusting the length and width unless you get the required settings. Once you are sure about your settings, keep in mind to take a paper and note down straight stitch settings. Afterward, you can practice the same for the zig-zag stitch that you will use to fill the embroidery on the fabric. Once you get a grip on the procedure, start sewing your design. Also have a look at Best Sewing Machines for fashion design students.
Step no. 4: Sewing Machine Embroidery Design
Pull the presser foot handle and lift it as much as the handle allows you. After this, adjust the hoop up the right side of the fabrics beneath the needle. The position should be the way described above; the left angle of the fabrics should touch the plate.
Point to the fabric part where you want to begin the stitching. Lower the needle until it grabs the bobbin thread using the wheel of the sewing machine. Also, lower the foot and keep running the wheel unless the fabric comes out with the needle. Check out if the thread is under the foot or not; make sure it should be under.
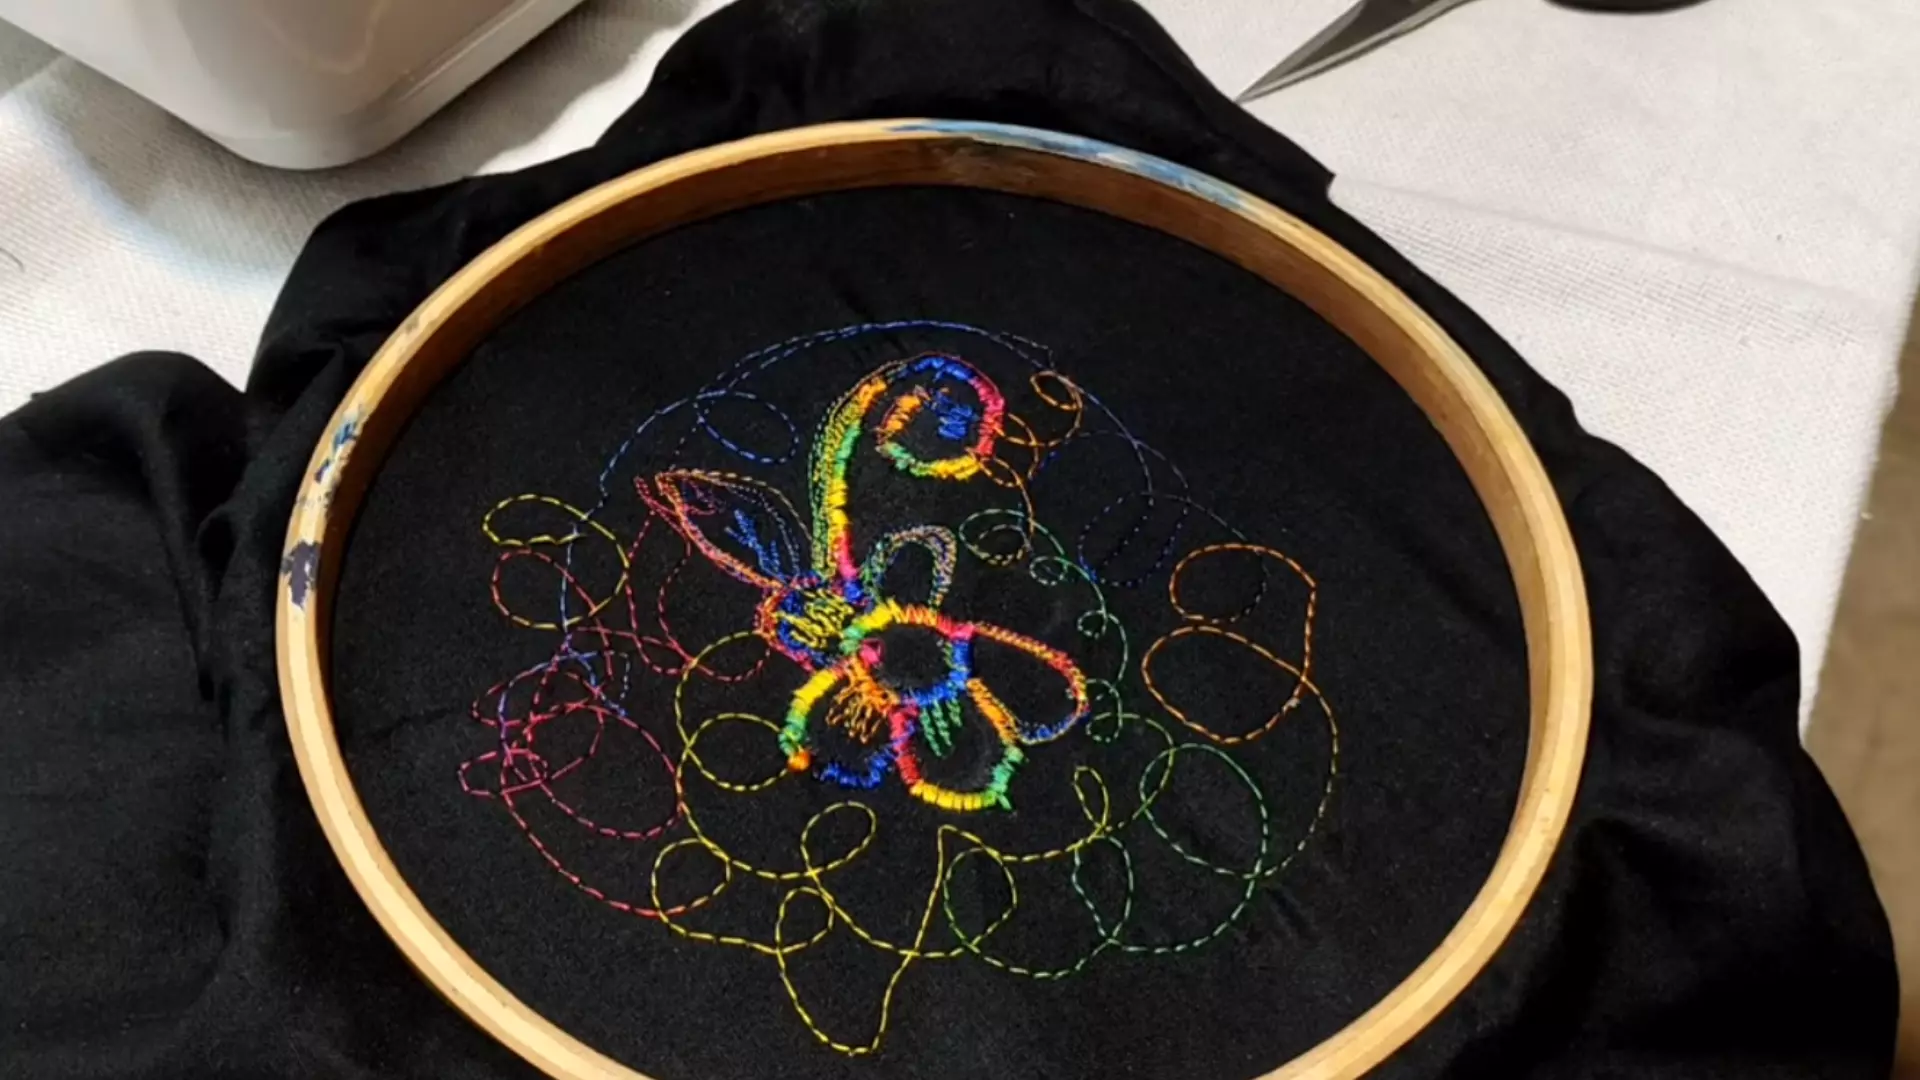
Bring the needle down again to begin sewing finally. For outlining the borders of the design, you can use a straight stitch. Carry the hoop as the design proceeds beneath the needle and sew slowly. Now turn the stitch into zig-zag and fill the space inside the borders; keep the speed slow of a process likewise above. Make your design fills neatly and precisely.
Step no. 5: Final Touch
- Suppose you were using tearaway backing; finish it right now.
- Remove all the useless threads with a sharp scissor.
- Take the iron and press the backside of the fabric to end the process.
Require Tools for Embroidering with a Machine
If you want to have a successful embroidery design on your fabric, then make sure the following factors should be included in the machine.
Hoop
If you want a precise embroidery design, make sure to use a hoop. The embroidery hoop will keep the fabric in control; don’t let it go in the wrong directions. It will hold the fabric perfectly. Also, it helps you in maintaining the right direction while embroidering.
Free Motion Foot
With this tool, you can move the design on the fabric as you require it to move. The main aim of using this foot is to protect your hands from the needle. So, the foot will not reach the fabrics; also, your finger will stay away from the needle.
Stabilizer
A stabilizer is a good tool if you want to do embroidery smoothly. Without a stabilizer, the fabric and thread will be stuck into feed dogs, resulting in machine gaming.
Embroidery Scissors
You can use tiny sharp scissors for cutting the extra thread around your design. So, your embroidery looks neat and adequate on the fabric. These embroidery scissors will effectively complete their works.
Another important factor is to lower the feeding of dogs. If you don’t follow this technique, the threat gets stuck into feed dogs every time you sew.
FAQ:
What type of needle do you require for embroidery?
The type of needle depends on the type of fabric. For instance, if you want to sew a lightweight and thin fabric, you will require small sharper needles. In contrast to it, a larger needle will help you sew heavyweight fabrics.
When you choose to embroider the cloth, you will use embroidery needles. These needles are easily available; you can explore them and pick which suits you best.
What type of thread should you use to embroider the fabric?
Along with an embroidery needle, you will also use a specific embroidery thread. This thread is different from the common thread. The thread used for the embroidering is smoother and thinner, giving the most creative outputs.
What is the difference between machine and hand embroidery?
Both ways are immensely different and have their perks, anyhow the hand skill is way more difficult and makes one get tired soon. Hand embroidery is traditional and requires only fabric, thread and needles, and sometimes hoops. In this type of embroidery, you can use numerous unique stitches.
Whereas machine embroidery consists of two types of embroidery, one is needle painting, and the other is program embroidery. The hand-guided or needle painting is for newbies; you require a sewing machine and feed dogs. You can operate the machine easily where you only have to control the movement of fabrics and stitch the fabric in any direction. You can also make a sketch and then embroider it.
However, the programmable machine is the most advanced option of the two above. This third way provides you with several embroidery styles. Plus, it enables you to design letters, numbers, and signatures. This machine embroidery is very convenient and beneficial for those who work at the commercial level.
Overview:
Some sewing machines offer embroidery stitches; you can consider them if you want. Please explore all the features of the machine at least once. For this, you can read the manual and follow the instructions given there. Grab the hoop correctly to direct the direction of stitches if you see your machine automatically ready for the stitches.
Nevertheless, some people feel the start and off buttons are quite convenient. Your sewing machine will start to embroider the design and stop once the design is complete once you press the start button. So, here you don’t need to worry about the speed and leveling of the fabric.
You can follow the guide about how to embroider with a sewing machine, especially if you are a beginner in this field. We try to be as precise as possible and give you all the needed information to help you embroider your design with a regular sewing machine. I believe the post will guide you the best; if you still feel confused so once again, reread the post. After this, things will be quite easy for you. Thanks.