How to Use Embroidery Stabilizer – Embroider With Ease
What is your experience with embroidery? Is there anything you would like to add to your embroidery? Yet you didn’t find ways to embroider that were accurate and stylish. Then,
Take a deep breath! It’s the end of all your research. Everything is here! Let’s start learning how to use an embroidery stabilizers with each pinch.
What is the Stabilizer?
A stabilizer is crucial to stitching out the embroidery design on most fabrics when machine embroidery is done.
Stabilizers Function and Types:
A stabilizer serves as a foundation, helping to support the fabric while the embroidery machine stitches out the design. You may experience issues such as fabric distortion and puckers within or around the design and the stitches sinking into the fabric if you don’t use stabilizers.
Types of Stabilizers:
Fabric stabilizers for hand embroidery come in various types and weights, but there are a few basic types. The most appropriate use will typically be listed for each kind, but you can try multiples and see which you like best.
1. The Fusible:
While stabilizers are most often used with sewing (and are referred to as interfacing), they’re also of great value when it comes to standard embroidery. After you finish your work, the lining stays on the back of your work since it was ironed to the wrong side of the fabric before stitching.
2. The Cut-Away
It’s a good choice for hand embroidery on stretchy fabrics as well. Machine embroidery is most often filled with a cut-away stabilizer. The wrong side of the fabric should be basted or hooped in place before sewing. You leave the stabilizer underneath your embroidery, but you cut away any excess when you’re done.
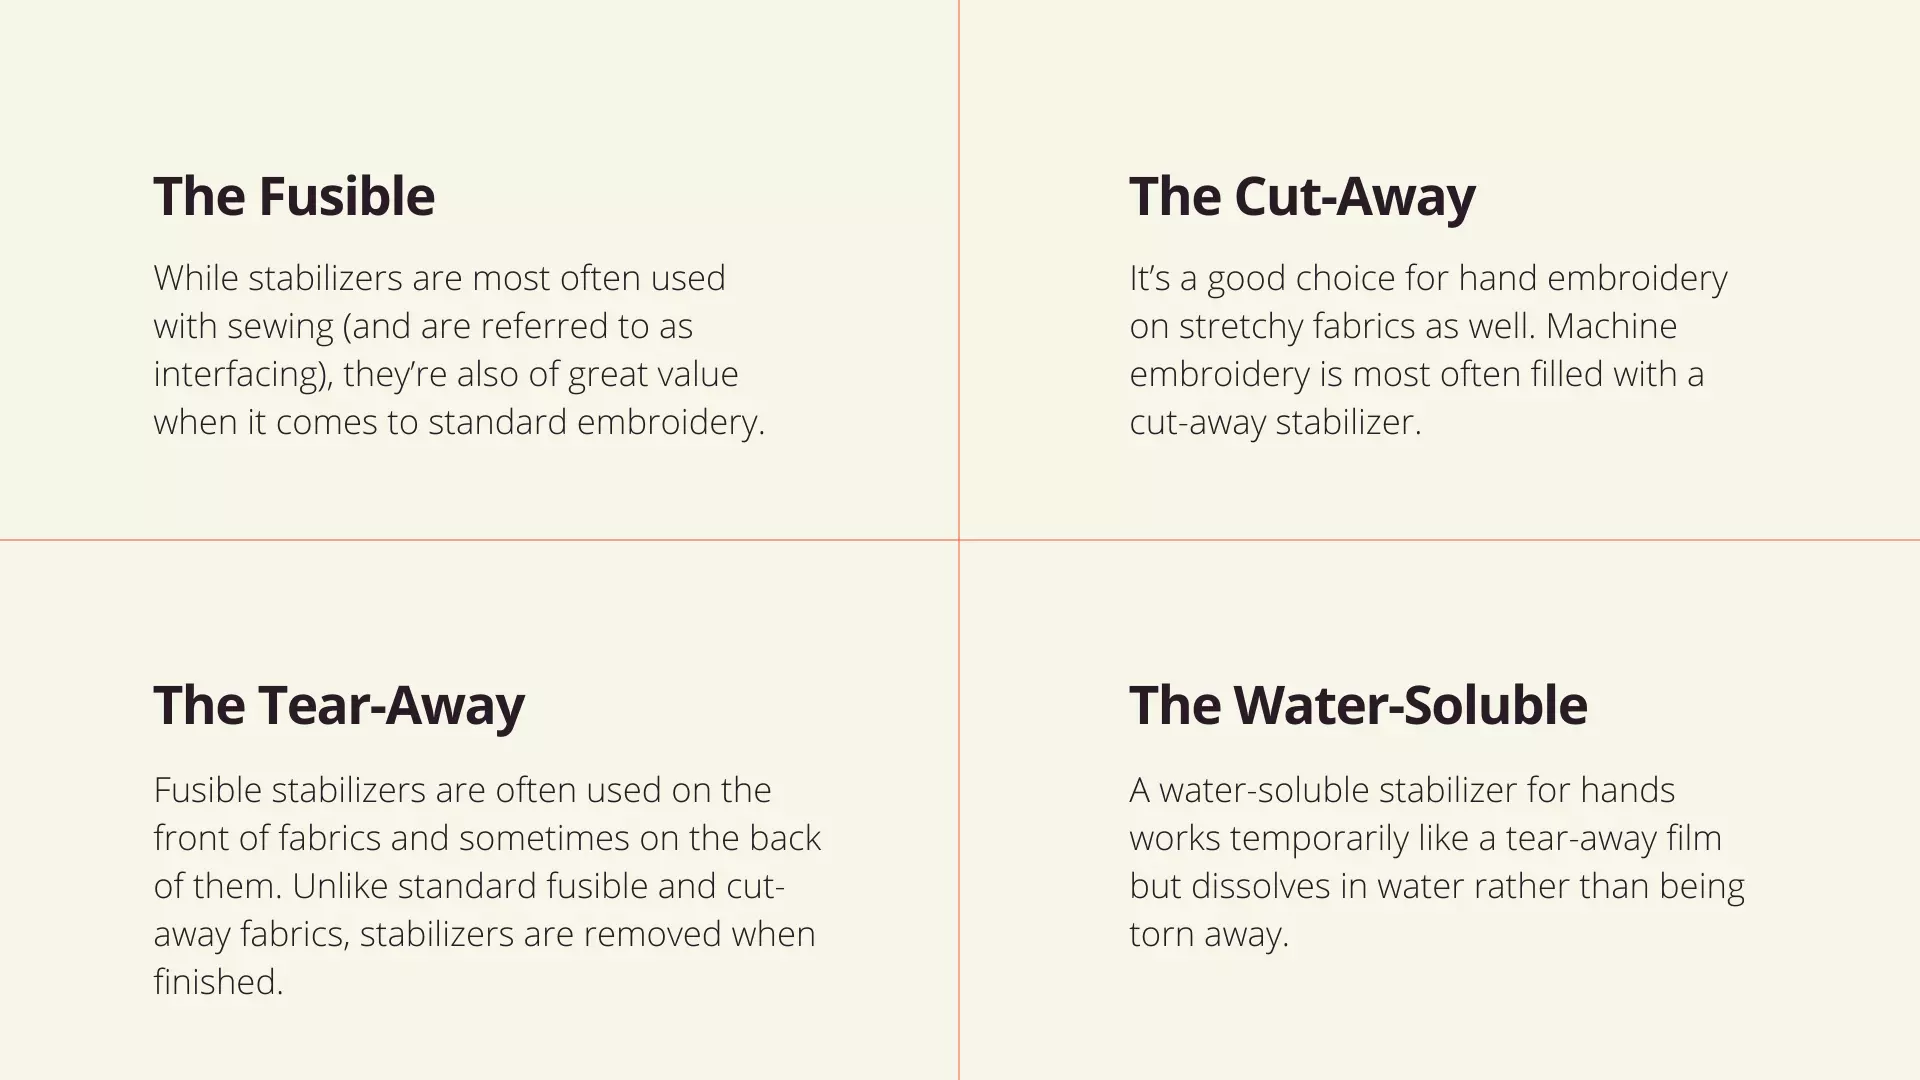
3. The Tear-Away:
This is a good alternative to a cut-away stabilizer when you want some support for your fabric as you stitch. Fusible stabilizers are often used on the front of fabrics and sometimes on the back of them. Unlike standard fusible and cut-away fabrics, stabilizers are removed when finished.
4. The Water-Soluble:
A water-soluble stabilizer for hands works temporarily like a tear-away film but dissolves in water rather than being torn away. A pattern marker is useful for marking a pattern, but the back of your work can also be marked.
The Best Time to Use a Stabilizer:
There are many fabrics used for fabric stabilizers for hand embroidery; let’s take a deep look at it!
The Stretchy Fabrics:
The most common reason people reach for a stabilizer is because of this. Having this material incorporated into knits or other stretch fabrics enhances the quality of your embroidery by preventing it from becoming distorted while stitching. T-shirts usually need this material to prevent distortion. A temporary stabilizer is suitable for use in this situation. Nonetheless, you may wish to leave your embroidery in place if you wash your garment frequently.
Fabrics with a thin or light color:
Utilizing a stabilizer when embroidering on semi-sheer or light fabrics can prevent your work from showing through the back. It’s important to have an extra layer to stop your work from showing through, even if it’s a light stabilizer. Redwork is a perfect example because the dark thread will show through the white fabric. It is best to use a permanent stabilizer in this case.
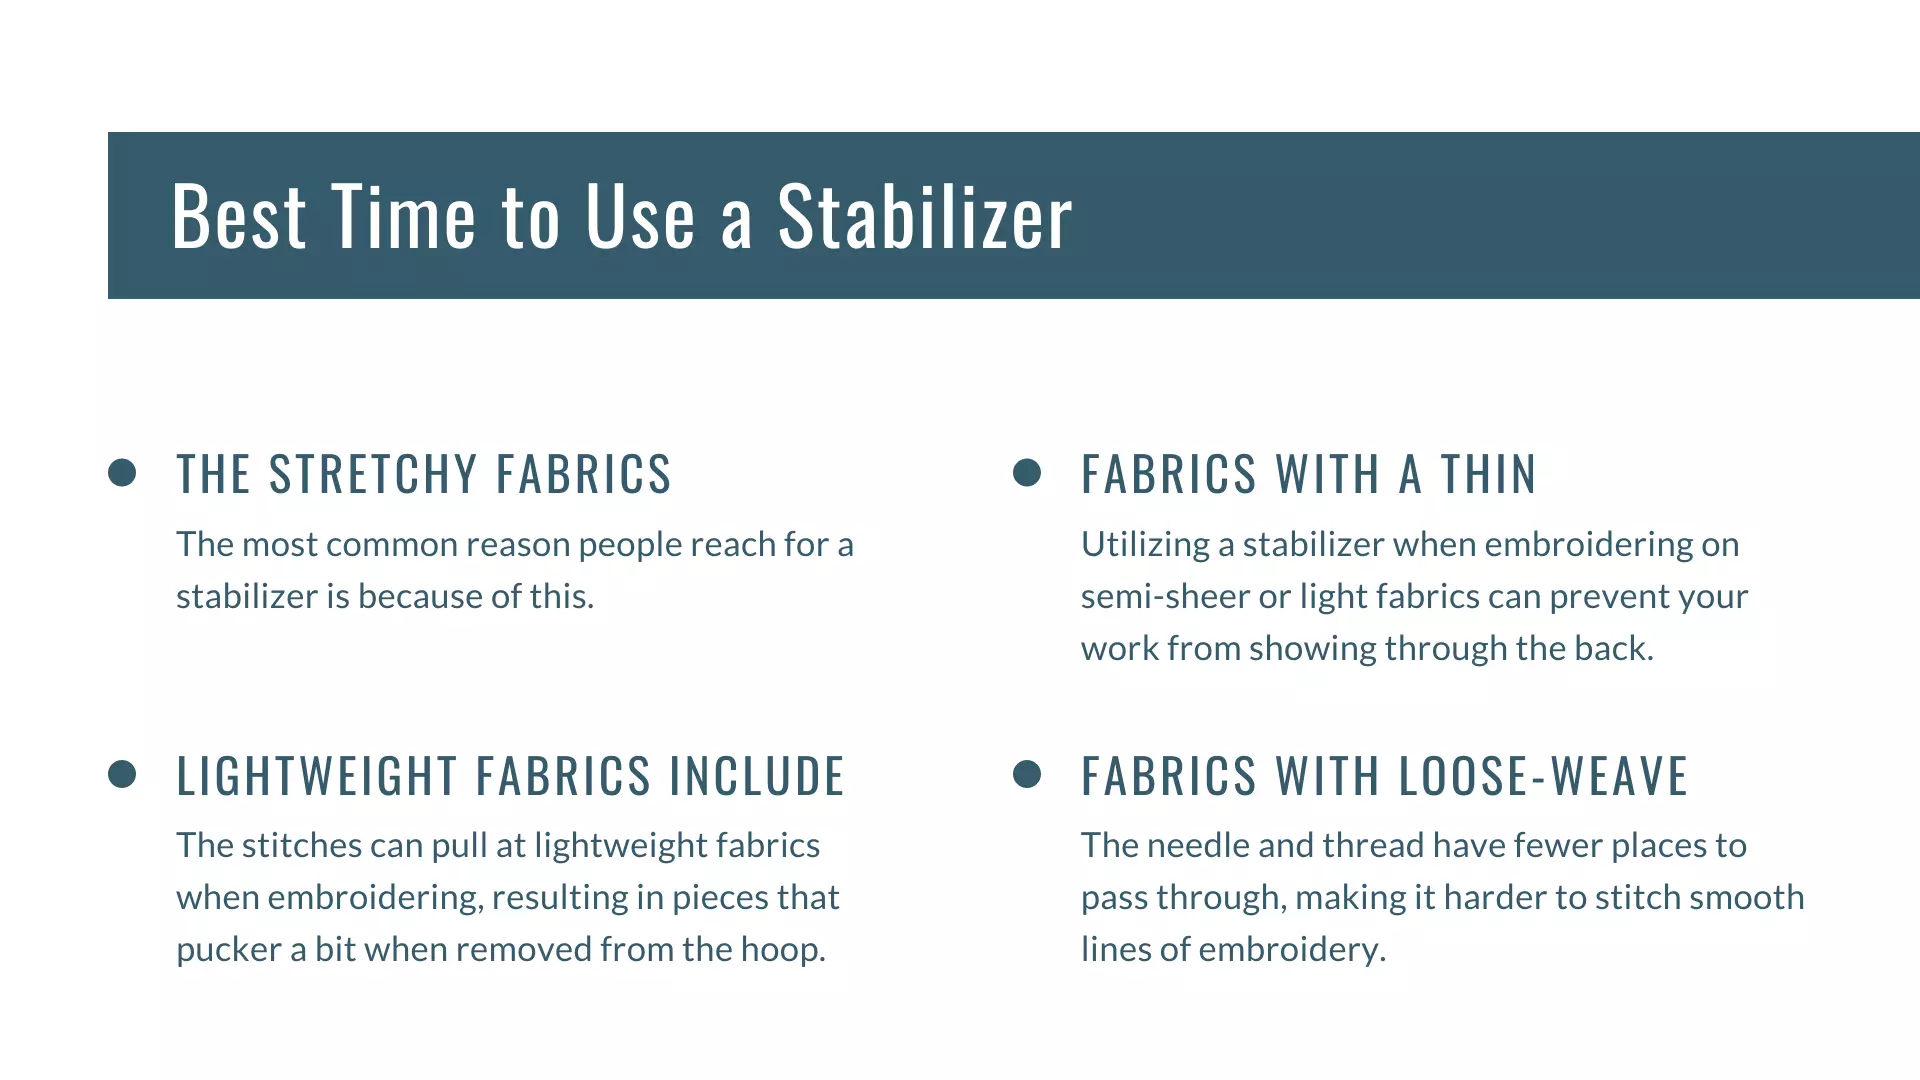
Lightweight Fabrics Include:
The stitches can pull at lightweight fabrics when embroidering, resulting in pieces that pucker a bit when removed from the hoop. Stabilizers, on the other hand, tend to stabilize fabrics. They reduce the likelihood of stitches slipping or pulling. Whenever possible, use a permanent stabilizer while embroidering, so long as it will not interfere with your project. Also have a look at, can you embroider without a hoop.
Fabrics With Loose-Weave:
There may be some space between the fibers of some fabrics like linen or osnaburg. The needle and thread have fewer places to pass through, making it harder to stitch smooth lines of embroidery. As a result of the stabilizer, a tight weave forms on the back of your work, creating a concealed structure. Ensure the stitches don’t shift when you’re done using a permanent stabilizer.
In a nutshell:
In most cases, stabilizers are not necessary, but they can make stitching a little easier in some cases. It is best to keep some fusible interfacing or stabilizer on hand for most basic embroidery projects since it will be helpful to you when you need support from this helpful supply!
Till now, you’ve learned about the basics of stabilizers for hand embroidery. But now you’ll be going to get a good taste at embroidery.
Mark Your Pattern with Water-Soluble Stabilizers
Transferring embroidery patterns by tracing is a simple method that involves no special materials. Even though a regular pencil works for tracing, not all patterns are compatible. If you have mixed results using iron-on transfer pencils or pens, it may be time to try a different method. Embroidering certain fabrics is so much easier when you use a water-soluble stabilizer.
Two Categories of Water-Soluble Stabilizer
Two kinds of stabilizers are available, one comes without a backing, and one comes with a peel-off back so you can stick it to your fabric. The stabilizing materials available are sheets, rolls, and by the yard.
A peel-off backing can be run through a printer, making transferring a complex design easy! It is also possible to trace your designs manually on the material.
Instruction for Using Water-Soluble Stabilizer:
- An adhesive-backed stabilizer is on the left, and a non-adhesive stabilizer is on the right. It is possible to trace with a ballpoint pen, fine-tipped permanent marker, or soft-lead pencil. Make sure the marker or pen you use is close to the thread color because the ink can bleed when the material is removed.
- To hold the non-sticky material in place as you stitch, baste it to the hooped fabric with a few large stitches. To hold the peel-off material in place, remove the backing and stick it onto the fabric. Press it down to help it hold.
- Embroider through both the fabric and stabilizer as if you were embroidering normally. After your embroidery is completed, remove the basting stitches if you used them and cut away any unwanted material.
- Lukewarm water should be used to soak the embroidery. As soon as the stabilizer dissolves, the embroidery will be ready to go. Rub it off a bit with your fingertips, or try warm water if it still won’t come off. You can also give it a final rinse under running water if necessary. Hang the embroidery to dry after removing excess water with a towel.
How to Stabilize Hand Embroidery with 2 Best Stabilizers?
- Textile and clothing embroidery stabilizer
- Embroidery with water-soluble stabilizers
1. Textile and clothing embroidery stabilizer:
To embroider on clothing, I always use Pellon Stick and tear away on the back of the fabric/piece of clothing I’m embroidering on. A stabilizer is made of paper with an adhesive side, and when you are finished, you can tear it away.
If you are working with see-through fabric, I wouldn’t recommend this stabilizer because some of the stabilizers may be hard to remove. T-shirts and sweatshirts made from knit material and stretchy are ideal for this type of fabric.
However, there is one thing that I like about stick-and-tear stabilizers. Once you stick them on, they preserve the fabric’s weave and make stitching on them easier without distorting it or puckering it. In addition, I’ve found that the stabilizer makes it easier to get the needle through the fabric since it won’t stretch as much.
2. Water-soluble stabilizer:
We’ve already discussed this above!
What is an Iron-On Stabilizer?
Having an Iron-on stabilizer handy when adding stability to the fabric is a great idea. Without pinning or basting, ironing onto the backside will take two minutes.
Start by cutting the fusible interfacing as soon as you have the fabric piece in your hand. Using similar pattern pieces as the primary fabric, cut it over the stitching line. When the interfacing is lightweight, cutting and trimming are not necessary.
The stabilizer needs to be applied at the back of the fabric appropriately placed over the stitching. Stabilizer interfacing comes in various thicknesses, materials, and stiffness, so you need to know that before using it. Choose one that is right for the fabric.
Here’s what you need to know about using an iron-on stabilizer for your embroidery.
What is the Best Way to Remove the Iron-On Stabilizer from Fabric?
The stabilizer on your fabric might need to be removed for any reason. Whether the interfacing got crooked or if the stabilizer was placed incorrectly on the material, this caused the problem. Perhaps you didn’t trim the stabilizer before you used it, or perhaps the stabilizer was too stiff for your fabric, and at last, you’re done with your project.
Once you apply the stabilizer, can you then remove it? The answer is yes.
A permanent bond is formed between the fabric and the interfacing, and it remains intact even after washing, drying, and wearing. Using an iron-on stabilizer is somewhat different from using a stabilizer that gets washed off after the job is completed.
Let’s grab your information! From this site and build a great taste at stabilizer embroidery by learning how to use embroidery stabilizer.