How to Transfer Embroidery Designs from Computer to Machine
Are you eager to transfer embroidery design from computer to machine? Then let’s learn how to transfer embroidery designs from computer to machine.
Early and enthusiastic adopters of the technology have always been a hallmark of ours. Copying files, managing directories, and using other computer skills are natural to some people. However, I realize that not everyone has these abilities. Several family members and friends have trouble getting embroidery designs from the source to their embroidery machines, whether they are using emails, downloads, USB sticks, or CDs.
Sources of Embroidery Designs
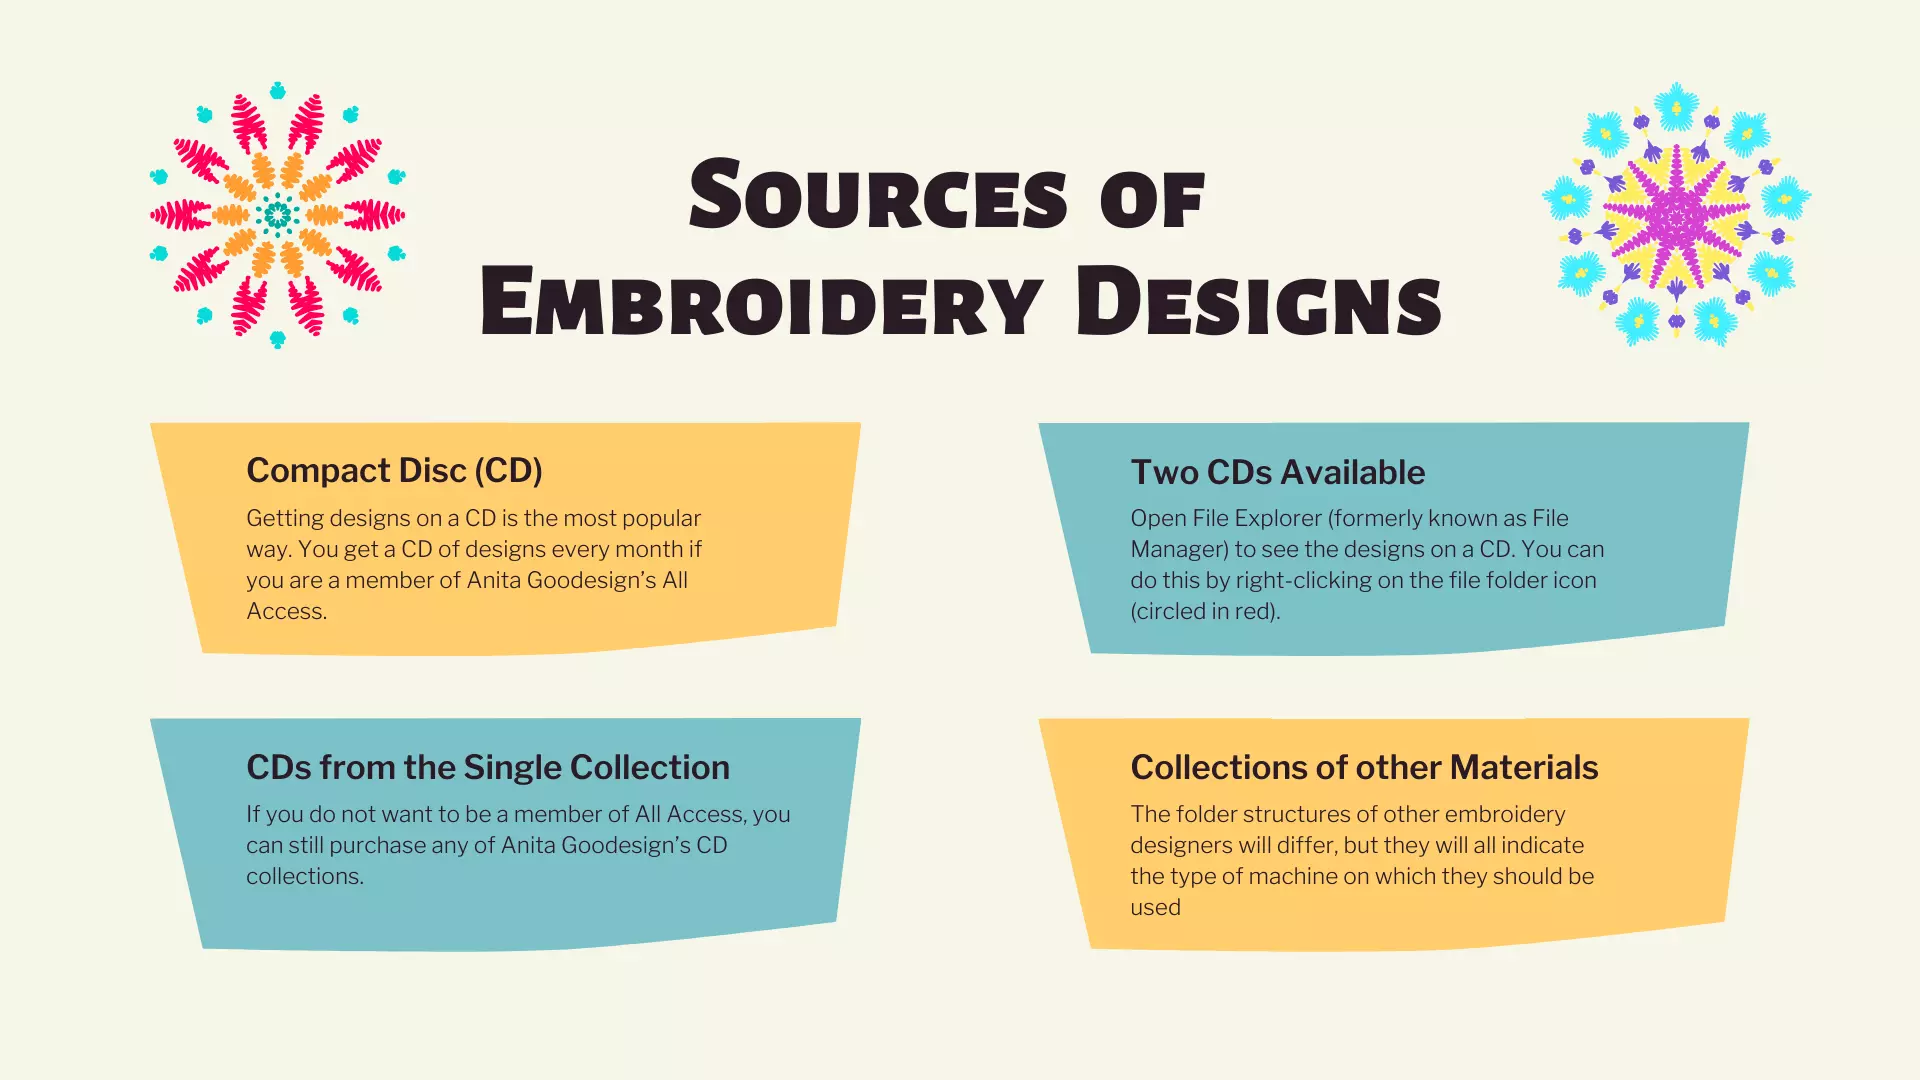
Compact Disc (CD):
Getting designs on a CD is the most popular way. You get a CD of designs every month if you are a member of Anita Goodesign’s All Access. Most design collections from OESD, KimberBell, Dakota Collectibles, Amazing Designs, etc., contain a CD of designs.
There Are Two CDs Available From Anita Goodesign:
Open File Explorer (formerly known as File Manager) to see the designs on a CD. You can do this by right-clicking on the file folder icon (circled in red). After clicking the right mouse button, select File Explorer from the menu.
You will now be able to access the File Explorer window. Browse to the drive where your source CD resides. You can view the contents of the DVD by clicking the DVD drive.
Collections are organized into separate folders. Collection folders (i.e., Double Exposure Animals) include a sew-out tutorial and a “Designs” folder with subfolders for each machine format. You can see a list of designs by clicking on any machine format folders.
CDs from the Single Collection:
If you do not want to be a member of All Access, you can still purchase any of Anita Goodesign’s CD collections. Many collections are available at the stores, and we can order more if they’re not in stock. Collections on the All Access CD follow the same file structure as those on the individual collections.
Collections of other Materials:
The folder structures of other embroidery designers will differ, but they will all indicate the type of machine on which they should be used. When the CD was loaded with some older design collections, an executable file would prompt you to select a machine format and destination location for the embroidery files.
Some More Additional Sources For Embroidery Designs:
Sticks with USB Ports:
The number of vendors who offer embroidery designs on USB sticks is rising these days. USB sticks make it easy to use embroidery designs with your machine. Select your design after finding your machine’s specific directory, opening it, and then selecting your design.
Directly using a USB stick has the disadvantage that all design formats are included on the stick, resulting in a slower loading time. You have only one copy of the designs on the USB stick, so be sure to make a backup or copy the designs to your computer.
Get The File Online:
Designs can be purchased and downloaded from online retailers. Some retailers desire to download their entire collection, while others sell individual designs. Most likely, you will be able to download multiple designs as a single file if you purchase more than one design. However, you will have to extract the files from the zip file first. It depends on the vendor whether or not individual designs are zipped.
By Email:
Online vendors may email you the designs they sell once you have purchased them. You will need to extract these designs before using them, just as they have been compressed into a “zip” file for the Online Download.
Is a USB Stick the Right Source to Use?
To read embroidery designs from a USB stick or SD card, most newer embroidery machines use a USB stick or SD card. Depending on the age of your machine, it may even take a small card or even a floppy disk. In any case, you must load designs onto the media your machine uses unless you are using designs built into the machine. The USB stick will be the destination of the designs for your machine in the context of this blog post.
It is recommended to use a USB stick with 4GB or less. USB sticks with more than 8GB capacity will not even be read in some machines. Even if they do, larger sticks with many designs take longer to load into the embroidery machine. Many embroidery designs can fit on a 2GB USB stick because stitch files for the embroidery machine are usually small (less than 500kb). We offer USB sticks that are cute sewing-themed and come in 2 and 4 GB sizes.
If you are about to embroider them, it is highly recommended that you copy the directories and embroidery files to your computer hard drive to make them easier to load. If you would like to read my last blog, click here.
To see some suggestions on managing your embroidery collections, you can look at How to transfer embroidery design from computer to machine. Also check out how to transfer embroidery patterns.
Transferring Files From A Source To A USB Stick:
On A CD:
The Christmas Towel Scarves collection from the embroidery machine is a collection of designs you need to copy to a USB stick so that you can make them as Christmas gifts.
Click File Explorer on The Windows Desktop:
- The CD/DVD drive of your PC should be inserted with the source CD.
- By clicking on the File Explorer icon on your desktop, you can open a File Explorer window.
- Choose File Explorer from the drop-down menu again by right-clicking on the File Explorer icon. File Explorer will be opened in a second window, making it easier for you to transfer files between different locations.
- Open two File Explorer windows on your screen at the same time. You can do this by placing your mouse pointer at the top of the window and dragging it to either side of the screen while holding down the left mouse button. Hold the mouse button down until part of the window disappears and release it.
- You will see the window fill half of the screen, with smaller windows of other open applications on the other half of the screen. Additionally, you can see the second File Explorer that you opened earlier. You can click it and enlarge it to fill the whole screen.
- You can open a new File Explorer window if there isn’t a second window found by right-clicking on the File Explorer icon and selecting File Explorer from the pop-up menu. Drag the left mouse button away from where you placed the first window so that your mouse pointer is at the top of that window. After some of the windows move off the screen, release the mouse button.
Create A USB Stick By Copying Designs:
Make A Folder:
- Your computer should have a USB slot to insert a USB stick.
- The CD drive will open, and you’ll be able to navigate to the source directory. Click the CD drive icon to open it.
- Create a new directory with the name of the design collection on your USB stick in the other window.
- So that you can later find the designs, give the folder a name. I call it the directory where I stored the source files for mine.
- Right-click on the folder and select Rename from the pop-up menu if it was created with the name New Folder before you had a chance to type in a name.
Make Copies of The Files:
You can copy the files from the source disc by selecting them. The first file name in the list can be selected by selecting the checkbox by the word Name at the top of the list. Also, you can hold down the Shift key and then click the last file name on the list. That will select everything between those two points. You can select just some of the files by holding down the Ctrl key while selecting them.
Select The Files And Copy Them To Your USB Stick. This Can Be Accomplished in Several Ways.
By holding down the left mouse button, you can move them from screen to screen. You should ensure the files are copied to where you want them to be when you get to the destination window. Your mouse pointer will indicate where the destination will appear in a pop-up window. Be sure they’re copied to the right location before letting go of the left mouse button.
Additionally, you can copy by selecting Copy from the pop-up menu when right-clicking on the selected source files. Then, select Paste from the right-click menu and navigate to the destination folder. Before pasting, make sure you have selected the right destination folder from the right-click menu.
Now that your files are on the USB stick, you can insert them into your embroidery machine.
That’s all the information laid here! Let’s grab the information to learn! How to transfer embroidery designs from computer to machine.